Moving To Hugo

Create your own blog
My blogging experience started with blogspot. It was great until I realized that I needed something that was responsive.
The layout looked nice on 1024x768 but with the new generation of screens it started to look narrow.
I hated the look of the website when it seemed that I was wasting a lot of white space on the web pages.
I moved to wordpress.com to give that a try when they started their responsive themes.
The website looked great after a lot of customization but after writing some posts there,
I realized that I had to micro-manage a lot of styling every time I was writing some new section, like special blocks or tables.
The post writing was fun only for a short while. The enthusiasm died down pretty soon.
Options
I stopped blogging for a while for such reasons. Eventually I heard about Jekyll and was again motivated to try it.
However, since I had also moved from C++ to Python I figured there’s bound to be something that’s gonna be related to Python
so that I can quickly jump in and navigate my way into the code base should there be a need (and who doesn’t find reason to do that?).
Jekyll was ruby based and that was holding me back a bit.
During my research I found out three options:
Jekyll- A lot of mileage but based on
ruby
- A lot of mileage but based on
Pelican- During my testing everything was great about it. Even setting up themes was extremely easy. Anything I tried, worked at my first try.
- The biggest drawback against
pelicanandjekyllwas that the bigger the number of posts get the longer it takes for compilation to take place
Hugo- Was deemed to have the best build times of 1ms per page
- Extremely easy setup with
livereload - Lots of other smaller features but just these two items were enough to get me sold on
hugo.livereloadis a killer feature as it means you don’t have to keep on rebuilding your site every time you want to view how the contents affect your site. It was also extremely easy to make theme changes and see them in action, straight away. We will see details of this, later. - Was already using
pelicanbut decided to givehugoa weekend and see it from there. I am glad I did.
Installing hugo
Running it on mac, installation was pretty straightforward using brew
brew install hugoI wanted to setup Pygments as well for code scripts as well.
I knew that I would be presenting a lot of code on my site and one of my main problems with site like wordpress was that
I had to manage a lot of styling for code sections which was not fun.
So I decided to install Pygments on default python by doing:
pip install PygmentsExporting wordpress
Since I wanted to move all of my wordpress content into hugo I really needed to export everything from wordpress. I found this link on wordpress to export all of the contents out into xml file.
https://wordpress.com/wp-admin/export.php?type=export
The next task was to convert the xml file into markdown files so that hugo could use them. However, I had already converted
some of my files earlier while working on pelican. Once I started using them I realized that my contents were not looking as expecting when I was iterating through
various themes. Sometimes things looked okay and other times not. I figured it must be something to do with how markdown was laid down from the xml file because
the tags and categories were missing. I double checked the wordpress xml file but it contained the tags and categories that I was looking for.
It was time to start digging again.
I came across exitwp which needed a bit of setup, but I was willing to give it a try. Here’s what I did:
git clone https://github.com/thomasf/exitwp
cd exitwp

cp wordpress.2015-08-23.xml wordpress-xml/


# install dependencies
pip install --upgrade -r pip_requirements.txt

# Run cmd with path to xml (optional if you have only one file)
exitwp.py wordpress-xml/wordpress.2015-08-23.xml
This creates a folder build/jekyll/OLD_WORDPRESS_URL/ with the contents inside it. Here’s my sample
$ tree
.
|-- _posts
|   |-- 2007-10-26-use-of-yield-statement.markdown
|   |-- 2007-11-23-dynamically-increase-label-size-autosize.markdown
|   |-- 2007-12-12-book-review-head-first-design-patterns.markdown
# ...............
|   `-- 2015-08-07-docker-container-cleanup-on-elastic-beanstalk.markdown
`-- about
    `-- index.markdown

2 directories, 42 files
You are ready to test with hugo now.
Using hugo
Now that we have made some markdown files, we just want to see how it looks like on default hugo setup.
hugo documentation mentions says that all you need to do is call it with your input files.
The idea would be to start a new folder, copy your markdowns there. Here’s what we need:
Setup
config.tomlfile for all the configuration that will be used byhugoto build the site- Markdown to be put in
contentfolder themes/{THEME_NAME}folder container the actual theme in{THEME_NAME}folder
Other minor things to note here:
- Output html files are put in
publicfolder.- It is usually a good idea to keep separate folders for testing and production otherwise you may inadvertently commit your dev test pages (thanks to
livereload
- It is usually a good idea to keep separate folders for testing and production otherwise you may inadvertently commit your dev test pages (thanks to
- I have seen hugo to complain quite a lot if you have your static files within
themes/{THEME}/staticfolder- You can get around it in two ways.
- Create a symbolic link from within your blogging folder by calling
ln -s themes/hyde-x/static static - Copy the
staticfolder as is in to the main folder location, as is by callingcp -r themes/hyde-x/static/ ./. However, do this only if you don’t intend to mkae any changes
- Create a symbolic link from within your blogging folder by calling
- You can get around it in two ways.
mkdir my_blog
cd my_blog
mkdir content
cp -r /PATH_TO/exitwp/build/jekyll/codersdigest.wordpress.com/* ./content/
Theme
Let’s start with a simple theme hyde-x
Here’s how to install it.
mkdir themes/
cd themes/
git clone https://github.com/zyro/hyde-x
Folder structure
Here’s how the folders look now. Use this for comparison.
tree -L 2
.
|-- config.toml
|-- content
|   |-- _posts
|   `-- about
|-- public
|   |-- 404.html
|   |-- _posts
|   |-- about
|   |-- categories
|   |-- css
|   |-- favicon.png
|   |-- index.html
|   |-- index.xml
|   |-- js
|   |-- page
|   |-- sitemap.xml
|   |-- tags
|   `-- touch-icon-144-precomposed.png
|-- static
|   |-- css
|   |-- favicon.png
|   |-- js
|   `-- touch-icon-144-precomposed.png
`-- themes
    `-- hyde-x
Config
Your config file could be as follows. Do note that I am also trying to build a menu for myself on the sidebar for better tracking.
It can be found under [[menu.
baseurl = "your_github_url"
languageCode = "en-us"
title = "title"
contentdir = "content"
layoutdir = "layouts"
publishdir = "public"
theme = "hyde-x"

pygmentsstyle = "native"
pygmentsuseclasses = false

[author]
    name = "your name"

[permalinks]
    # Change the permalink format for the 'post' content type.
    # This defines how your folder is structured
    post = "/:year/:month/:title/"

[taxonomies]
    # I wanted to use tags and categories
    category = "categories"
    tag = "tags"

[[menu.main]]
    name = "Posts"
    pre = "<i class='fa fa-heart'></i>"
    weight = -110
    identifier = "posts"
    url = "/post/"
[[menu.main]]
    name = "Tags"
    pre = "<i class='fa fa-road'></i>"
    weight = -109
    url = "/tags/"
[[menu.main]]
    name = "Categories"
    pre = "<i class='fa fa-road'></i>"
    weight = -108
    url = "/categories/"
Run hugo
Now that we have setup the contents, themes
$ hugo server
    0 draft content
    0 future content
    42 pages created
    0 paginator pages created
    18 tags created
    6 categories created
    in 53 ms
    Serving pages from /Users/your_username/code/githubs/_tmp/_del/public
    Web Server is available at http://127.0.0.1:1313/
    Press Ctrl+C to stop
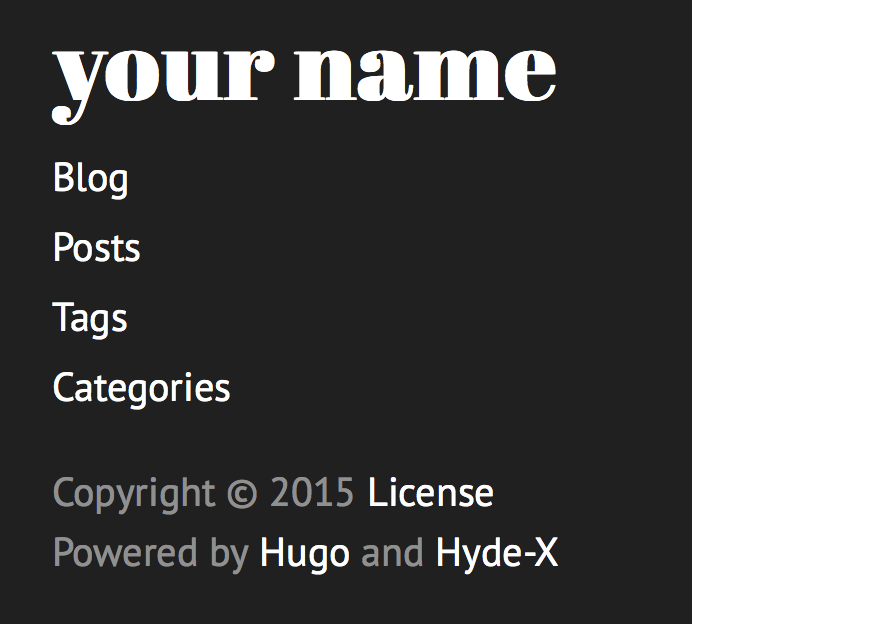
Final look
You’re done. How does it look?!

Your sidebar
Going further
This is only the beginning. There are still a few loose ends to tie up.
- Are you happy enough with the theme?
- If not, you can always try more themes
- What about code highlighting? Would you like more changes?
hyde-xalso provides it’s own version of highlighting through css files. You can useparamsto control that
I wasn’t happy with the code highlights as well the default layout the themes were providing. I created my own adaptation of hyde-x called hyde-a
Some changes I made were:
- Tags and Categories didn’t have their own proper
listingorsingletemplates - Every time you clicked on a tag/category, the list of all articles related to that term was also not shown properly
- Post listing only pincluded title and date. I was looking for related tag and category for each post
I fixed all of those with hyde-a
Hosting your blog
Now that we have created the blog, how about hosting it?
We have use a free service like GitHub Pages
Once we commit your html pages (the output) onto github on a different repo it will show up directly on github.io as well.
There are some concepts that you want to know. Learn some at [octopress])(http://octopress.org/docs/deploying/github/).
Create your own repo using the following logic:
- You must use the
username.github.ionaming scheme. - Content from the master branch will be used to build and publish your GitHub Pages site.
Automating your blog generation
Now that our blog is generated, we need to automate the process of creating the html from the markdown. If we have to commit to two repo - for markdown as well html pages, I feel like is too much of work.
I did some work with shippable and started automatically creating the html pages through it.
I have created another article about it while taking Elastic Beanstalk as the subject. The same applies for hugo though. You can find it here:
Elastic Beanstalk Deployment Automation
Once you have done it, all you need to do is:
- Locally write your markdown files
- Test using
hugo server -wto uselivereload - Commit your markdown
Shippable will pick it up from there. It will download the theme and create the html files.
It will also commit to the GitHub Pages for you and the site will be live automatically!
